From Lighting Designer to Unreal
Visualizers are expensive. Unreal Engine is free. This tutorial shows the basics of Unreal Engine so you can get up and running on a basic rendering for a client.
Computer Specs
In order to run Unreal Engine for stage lighting visualization, it takes a fair amount of processing power.
- GPU: NVIDIA RTX 2070 or higher; for laptops, an NVIDIA RTX 3000 series card is recommended.
- RAM: 32 GB DDR4, or 8 GB DDR5 minimum.
- Power: Plug your laptop into its power supply. Desktops also need to be plugged in — performance is throttled without it.
Before We Begin — Screen Size
Unreal Engine requires a fair amount of screen real estate. Everything is sized for a 1920×1080 display, and display scaling will make the interface difficult to use.
On Windows: Press Windows + P, then click More display settings at the bottom of the panel.
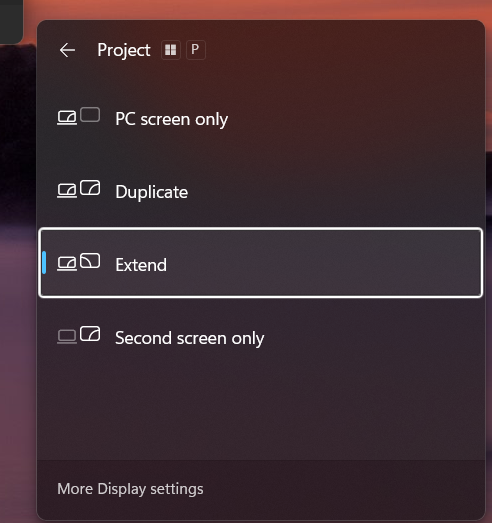
Click the screen you are using, then scroll down to Scale.
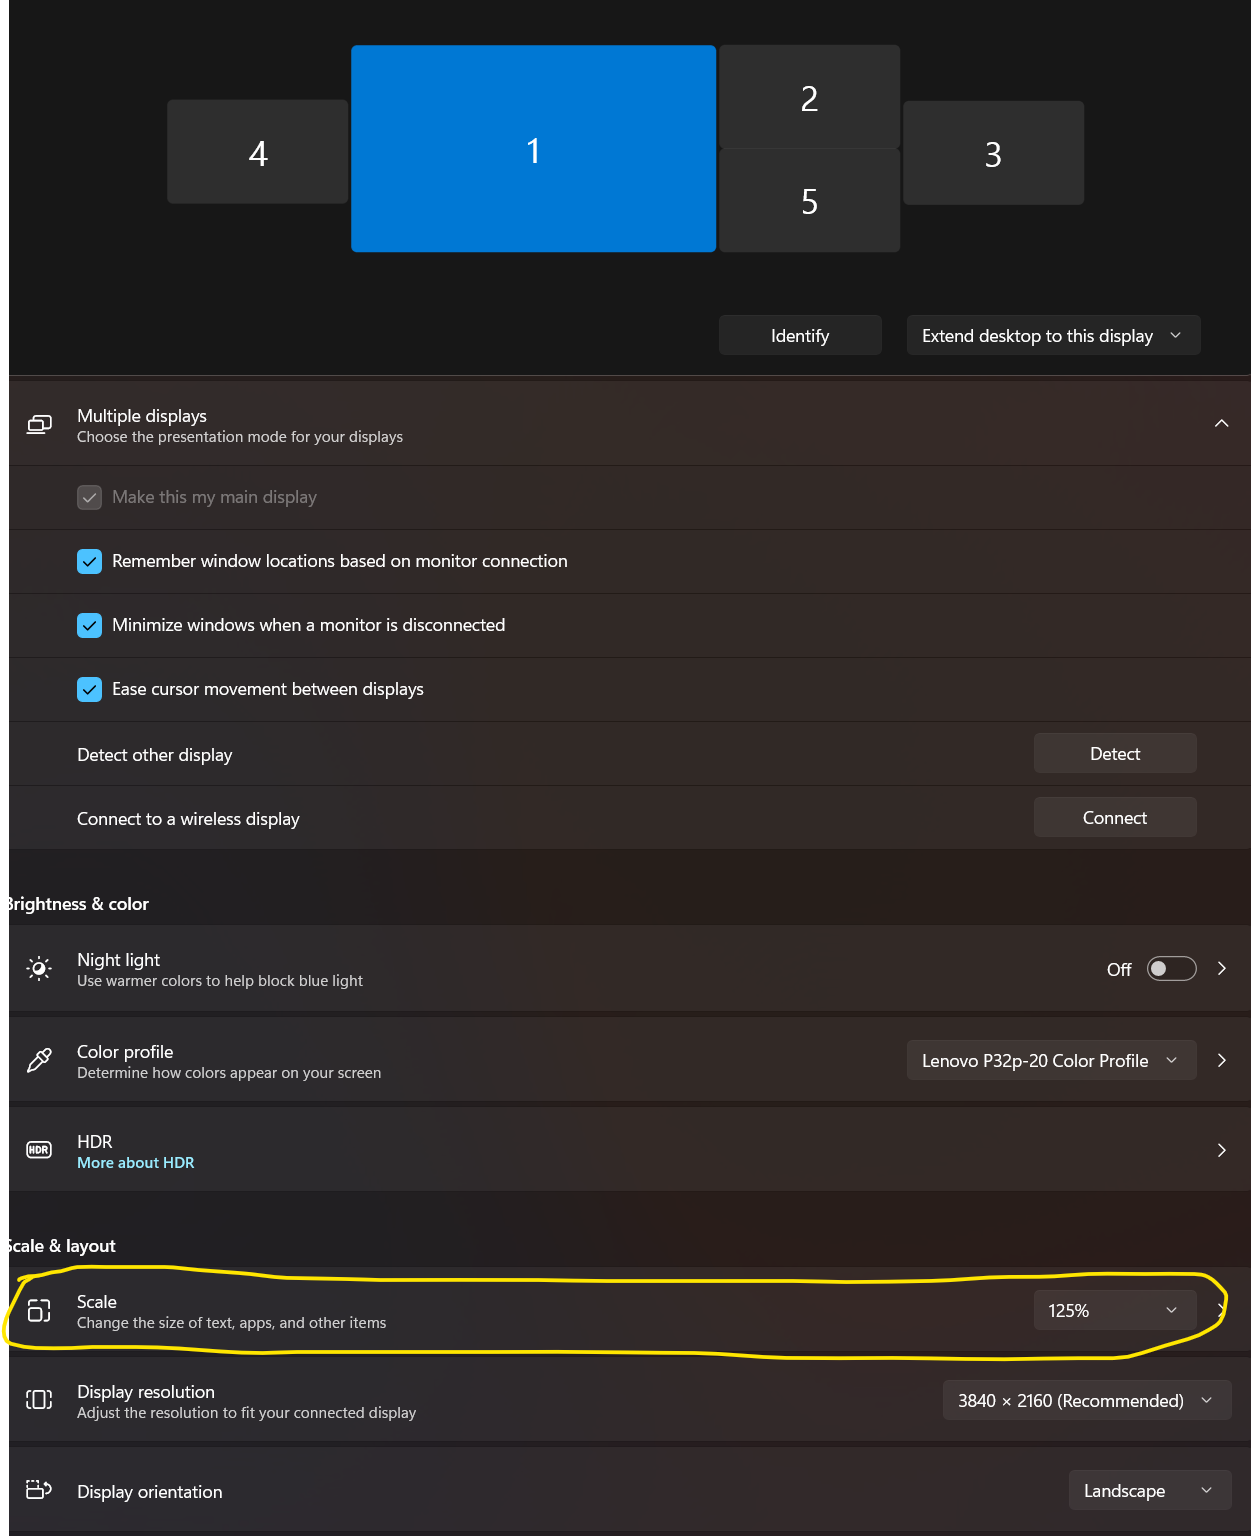
Scaling compensates for display sharpness but costs screen real estate quickly. For a 1920×1080 display, 100% scale is recommended, with 150% as the practical maximum. You can revisit this once Unreal Engine is open.
Opening Unreal Engine
If you have already installed Unreal Engine, either of these icons will launch it.
If you open via the Epic Games Launcher, navigate to Library and launch your desired engine version.
Keep in mind: you can always migrate a project or its assets up to a newer engine version, but never down to an older one.
The 1M Lights plugin runs on Unreal Engine 5.7.
Getting Started Resources
When Unreal Engine opens, you may see an Essentials tab under Getting Started. This is a great built-in tutorial series that covers the fundamentals of Unreal Engine — highly recommended before diving in.
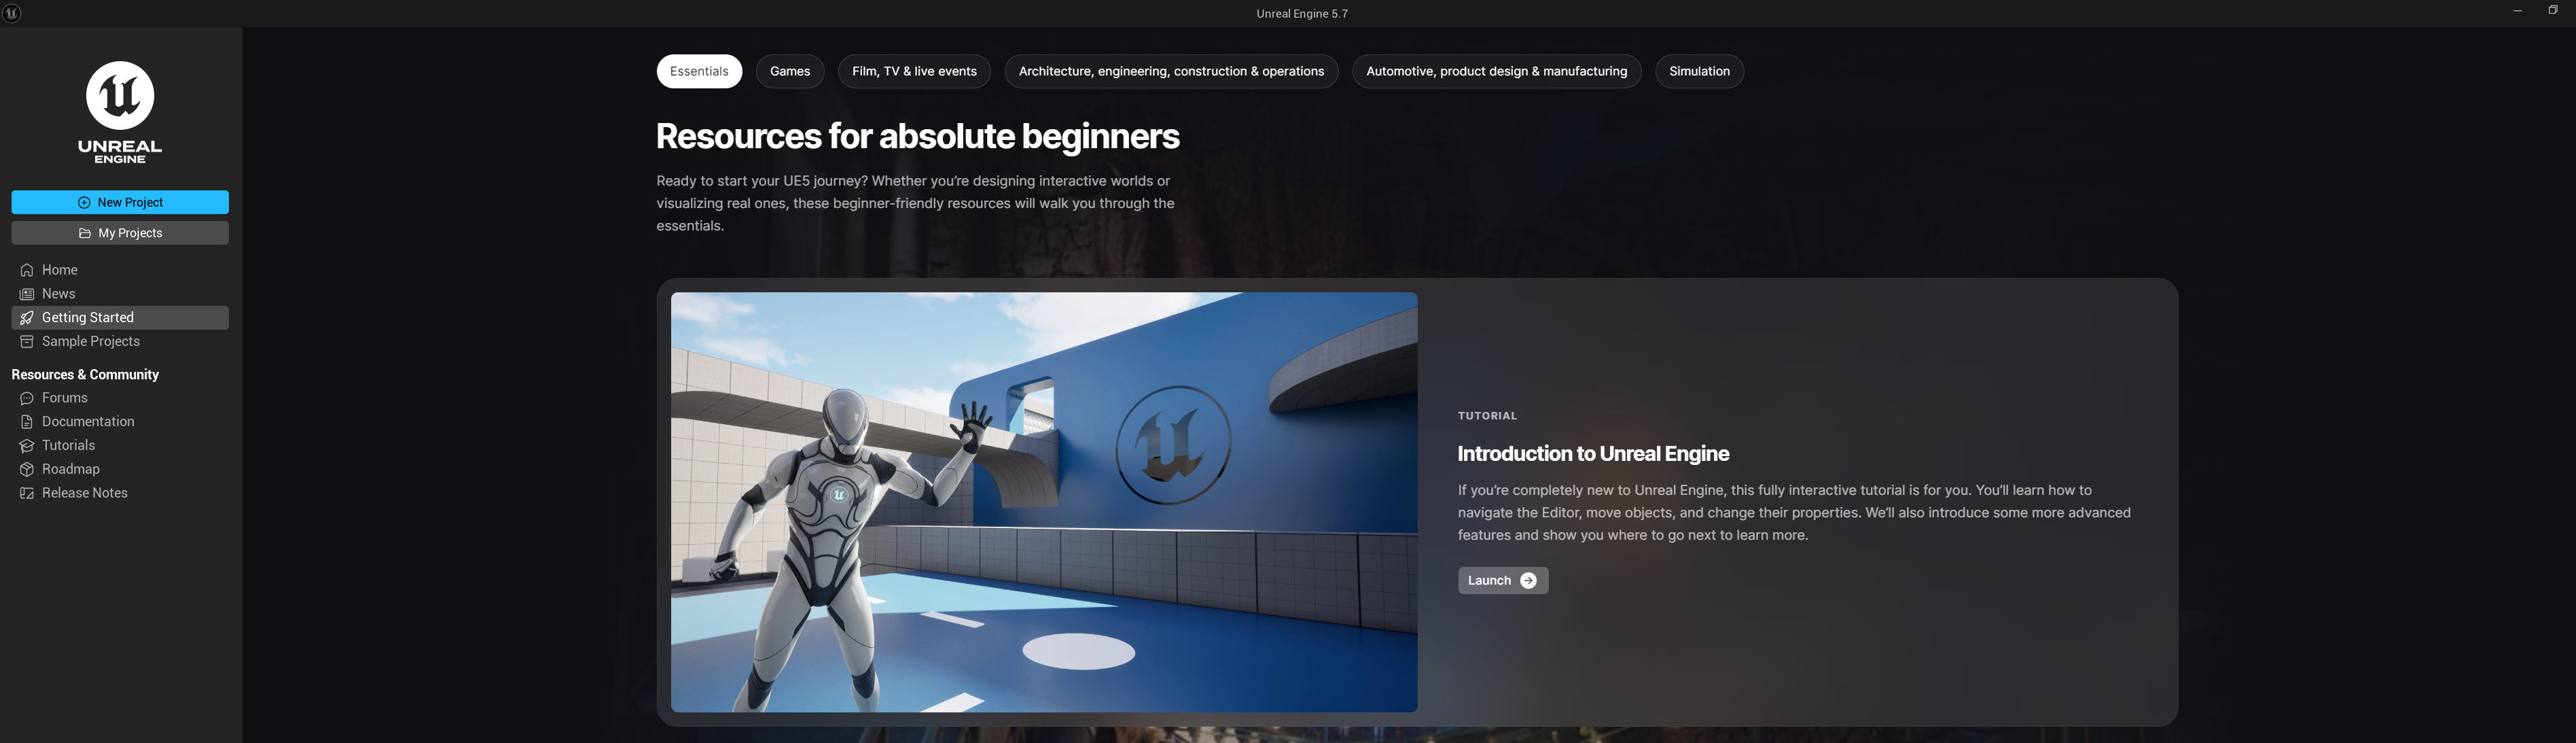
Many more tutorials are available at Epic's learning hub: dev.epicgames.com/community/unreal-engine/learning
This tutorial will cover some of the elements shown in the Essentials introduction, as well as the concepts needed for the Unreal Engine DMX Plugin.
Creating a New Project
When you are ready to dive in, click New Project on the left-hand side of the Unreal Engine project browser.
The categories — Games, Film/Video & Live Events, Architecture, Automotive, Product Design & Manufacturing, and Simulation — are template sets that give you a head start for different use cases.
For DMX work, navigate to Film/Video & Live Events and select the DMX template.
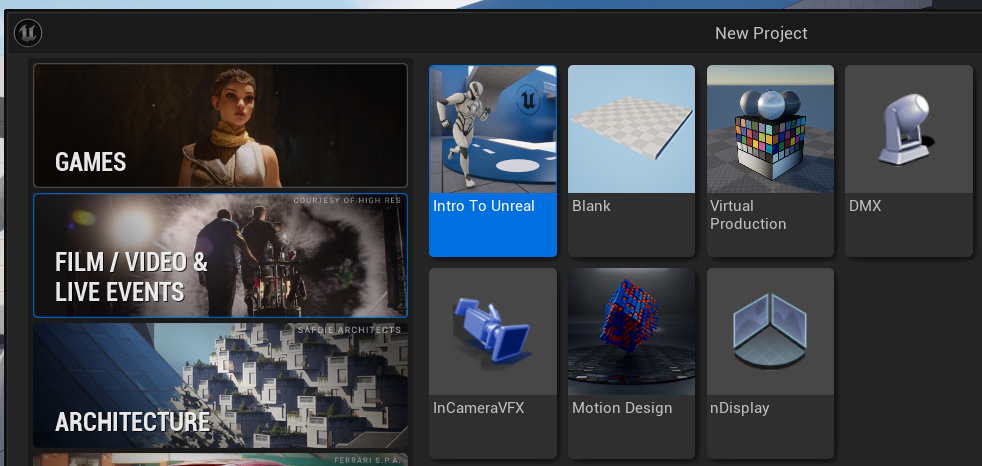
Set your project name by clicking the Project Name field in the lower-right corner.
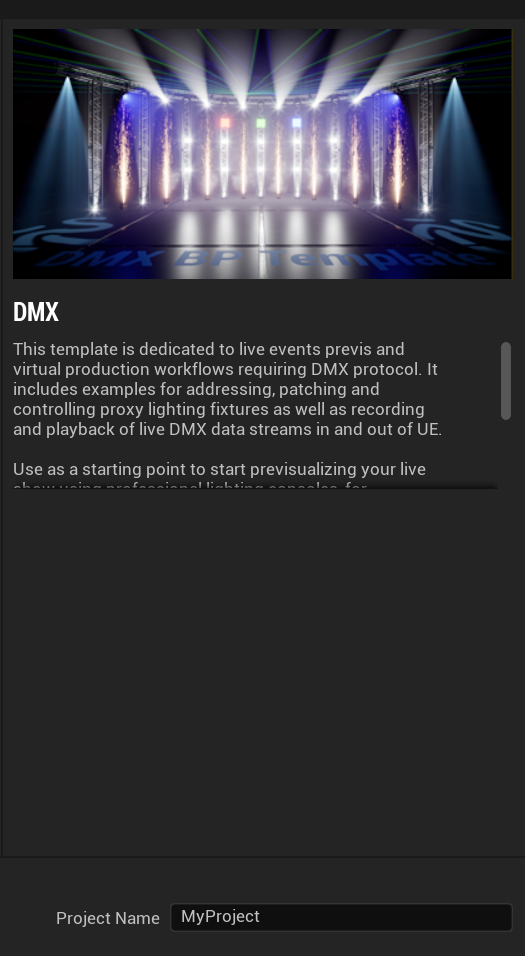
Then click Create.
Shader Compilation
After the project loads, Unreal Engine will compile shaders. This is a great time to grab a beverage or a snack — hydration helps with mental focus.
Once shaders have compiled, they will not need to recompile the next time you load this project. If they do recompile on a subsequent load, there is likely an issue with your Derived Data Cache (DDC) — that is worth researching if it happens.
Navigating
Moving around your 3D scene is what separates a still image or video from an actual 3D environment, so let's get that out of the way early.
If you have played computer games, you know that WASD is the standard movement scheme. It works the same way here, as long as you hold right click — W moves forward, S moves backward, A strafes left, D strafes right. The arrow keys do the same thing, without needing to hold right click.
Holding right click and moving your mouse rotates your camera and your direction of travel.
To move up, hold right click and press E. Press Q to move down.
Scrolling the mouse wheel moves you forward and backward. Holding right click while scrolling up or down adjusts your movement speed — this is an underrated navigation tip. Being able to accelerate and decelerate while flying with WASD makes it much easier to land precisely in a specific spot in a time-effective manner. It also helps when you end up aimlessly flying around while on a phone call with Unreal Engine open in the background.
To zoom in, hold right click and hold C. Hold Z to zoom out. Releasing right click returns you to your normal zoom level. Zooming all the way out and rotating your camera will cause a whoooahhh moment — use at your own risk.
Other Useful Shortcuts
G — toggles Game Mode, which hides all the editor symbols (light icons, camera markers, etc.) and gives you a clean viewport. Very useful in DMX projects where the scene can get cluttered with actor icons.
H — hides the currently selected item in the viewport.
F — frames the selected object in your viewport, snapping the camera to focus on it. One of the most useful shortcuts day to day.
Ctrl + D — duplicates the selected object in place. Faster than copy-paste for quickly building out rows of fixtures or stage pieces.
Alt + drag — also duplicates, but lets you immediately drag the copy to a new position in one move.
End — drops the selected object down to the nearest surface below it. Useful for snapping stage pieces to the floor without manually entering a Z value.
Ctrl + Z / Ctrl + Y — undo and redo. Use liberally.
Ctrl + S — saves the current level. Save often.
Saving Your Work
Once you have made changes you want to keep, it is worth knowing the difference between Save and Save All.
- Save — the floppy disk icon in the top-left toolbar, or Ctrl + S. Saves only the current level you are working on.
- Save All — located in the Content Browser toolbar, or under File > Save All, or Ctrl + Shift + S. Saves the current level, any Blueprints you have edited, and any imported assets. Get into the habit of pressing this often.
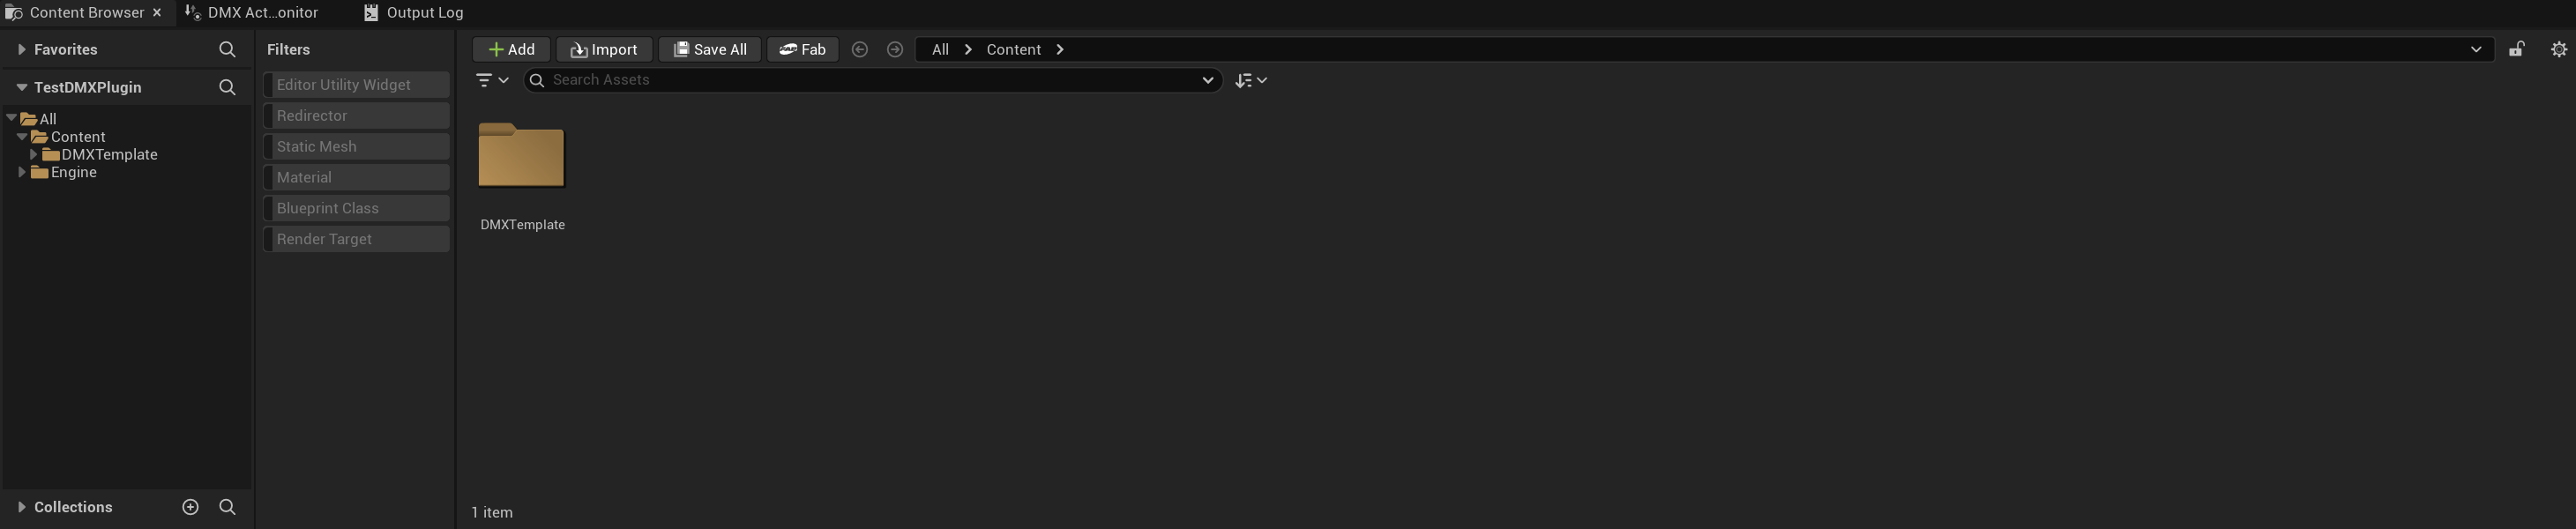
The Content Browser
This is the Content Browser, located in the bottom center of your screen. It holds all of the content assets in your project.
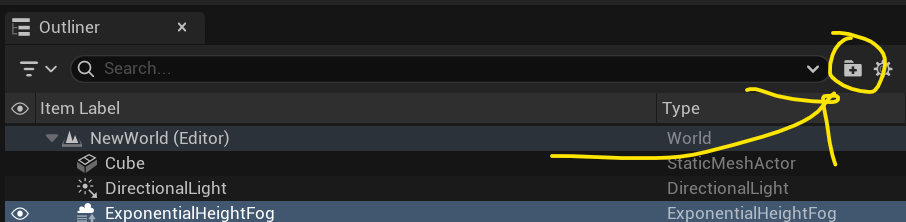
The Outliner
On the right side of the screen is the Outliner. Every object placed in your current level will appear here. You can click on the small divider bar between the actor count (e.g., "95 Actors") and the Details tab to get a resize cursor — click, hold, and drag down to expand the Outliner panel.
Content Browser vs. Outliner
The Content Browser shows all imported files and .uasset files in your project — think of it as your asset library. If you import a mesh called MyCoolMesh, it will appear there.
The Outliner shows only the objects from the Content Browser that have been placed into your current level. It does not show objects in other levels unless advanced multi-level setups are used.
You can place MyCoolMesh into your level five times and have five instances in the Outliner, while the Content Browser still shows only one asset. Editing MyCoolMesh in the Content Browser will update all five instances in your level. However, transforming an individual instance in the Outliner (moving, rotating, or scaling it) only affects that specific instance — the others are unchanged.
If you open a different level, MyCoolMesh will not be in the Outliner, but it will still exist in the Content Browser.
Clicking the eye icon next to an item in the Outliner will temporarily hide it in the viewport.

Showing Plugin Content
By loading the DMX Template, you have already loaded a project with the DMX Plugin enabled. However, its content will not be visible in the Content Browser by default.
Click the gear icon in the top-right corner of the Content Browser.

Locate the checkboxes for Engine Content and Plugin Content and enable both. The DMX Plugin content will now appear in the Content Browser for you to explore. You can find it under Engine > Plugins > DMXFixtures. More on this will be covered in the DMX Plugin tutorial.
Show in Explorer / Finder
Everything in the Content Browser — even engine content — is a real file somewhere on your computer. Sometimes it is useful to know exactly where. Right-click any asset and select Show in Explorer (or Show in Finder on Mac) to open a file browser window pointed directly at that file's location on disk.
The Details Panel
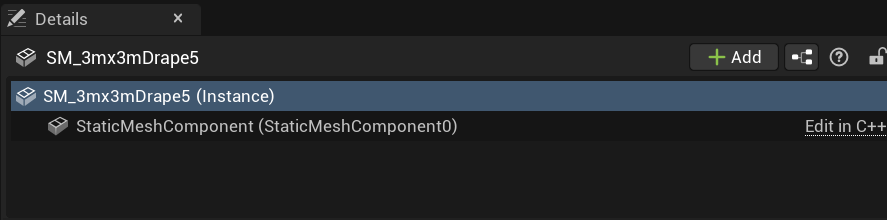
With an item selected in the Outliner, the Details panel displays all of its properties and any custom code (Blueprint logic) attached to it. The properties shown will vary depending on the type of object selected.
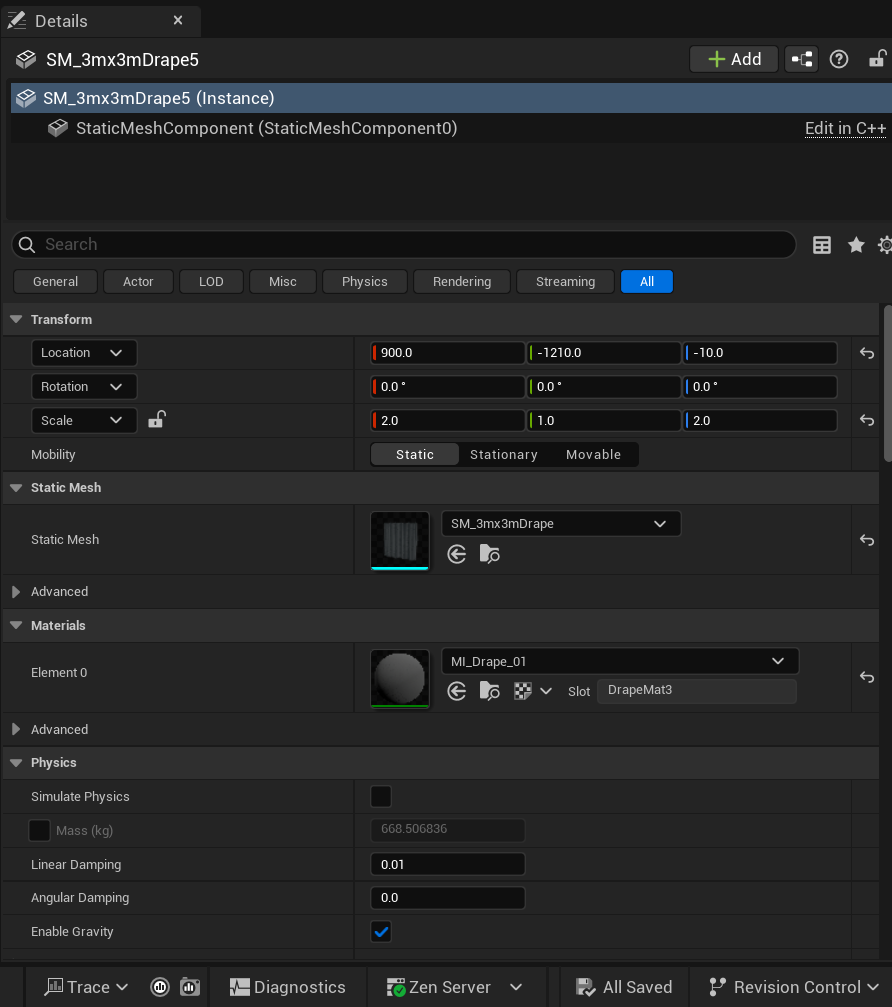
In this example, a Static Mesh Actor is selected. A Static Mesh Actor is a 3D mesh placed in the world with basic collision and physics — it exists in the scene and responds to the environment, but has no custom behavior or logic of its own.
Blueprint vs. Static Mesh Actor
Think of it in lighting terms: a Static Mesh Actor is like a practical fixture hanging in the rig — it is physically there, it looks right, but it is unprogrammed and does nothing on its own. A Blueprint is that same fixture now patched to a console with a DMX address assigned, parameters mapped, and effects programmed. It can respond to input, change state, and trigger other things in the scene. A Blueprint is a Static Mesh Actor (or any other object) extended with custom variables, events, functions, and components.
Components
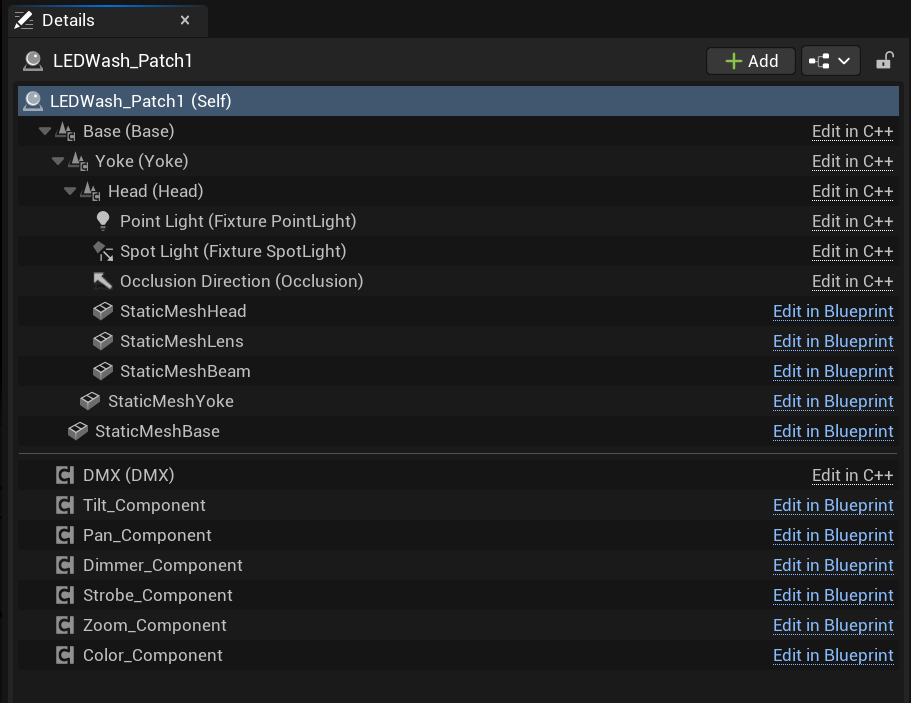
The Components section appears when a Blueprint is selected. Components are the individual pieces that make up a Blueprint.
Go ahead and click on an LEDWash_Patch fixture of the type BP_WashLED in your Outliner. You will notice that one Blueprint has five Static Mesh components: Base, Yoke, Head, Lens, and Beam. This is because building a convincing moving light requires multiple components working in sync — the Lens mesh illuminates, the Beam is actually a mesh with a complex material applied to it (it is not real light), and a Spotlight Component also exists. The Occlusion component assists with light direction logic. The Point Light component, from what can be observed, does not appear to do much and is likely not fully developed — however, it is written into the underlying code and causes errors when deleted, so leave it alone.
You will also see parameter components such as Zoom, Strobe, Color, Dimmer, Pan, and Tilt. These are modular pieces of code — similar in concept to plugins — that affect the behavior of whatever Blueprint they are attached to. We will cover these in more detail later.
You can select any component and reposition it using the Transform controls, but this only affects its placement within that Blueprint instance, not other instances in the level.
Transform

The Transform panel is the most commonly used section of the Details panel. It tells you where an object is, what rotation it is at, and what scale it is at.
A quick note on terminology: in everyday language, transform is a verb. In Unreal Engine, a Transform is a noun — it is a data structure that carries three properties: Location, Rotation, and Scale. Each property is represented by three values: X (red), Y (green), and Z (blue).
You can edit these values directly in the Details panel, or by using the gizmo — the red, green, and blue handle that appears at the center of any selected object in the viewport.
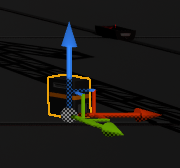
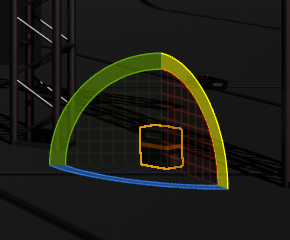
Switch between gizmo modes using keyboard shortcuts: W to move, E to rotate, R to scale. You can also click the corresponding buttons in the upper-right corner of the viewport.
Blueprint Variables
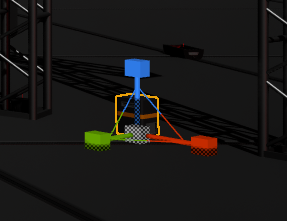
Underneath the Transform section is any variables that are specific to the Blueprint type you have selected — ones that the developer chose to expose for the user to control. This is a user-friendly way of allowing code behavior to be adjusted without ever opening the Blueprint editor. Take a look at the variables exposed for the DMX_Pyro asset.

These variables feed directly into code logic — in this case, they affect the Niagara Particle System that drives the fire effect, controlling things like flame density and the speed at which particles emit. Increasing them will not set anything on fire in real life, but your GPU will start to feel it if the particle count gets too high.
Beyond this, the parameters exposed in the Details panel get very specific to the Blueprint or asset type selected. Experimenting with them will not cause any lasting damage — and if it does, breaking things is how we learn.
One note: the Physics tab on Static Mesh Actors has no visible effect until you enter Play Mode.

Play Mode is the green arrow button in the top-right area of the toolbar. It simulates the experience as if the project were compiled and running on a target device — a PC, phone, or game console. For the Unreal Engine DMX Plugin specifically, fixtures can run and respond to DMX without ever needing to enter Play Mode.
Example: The Directional Light
To wrap up the Details panel, here is one final example that comes up frequently in DMX projects. Find the Directional Light in your Outliner — you can use the search bar at the top to locate it quickly.
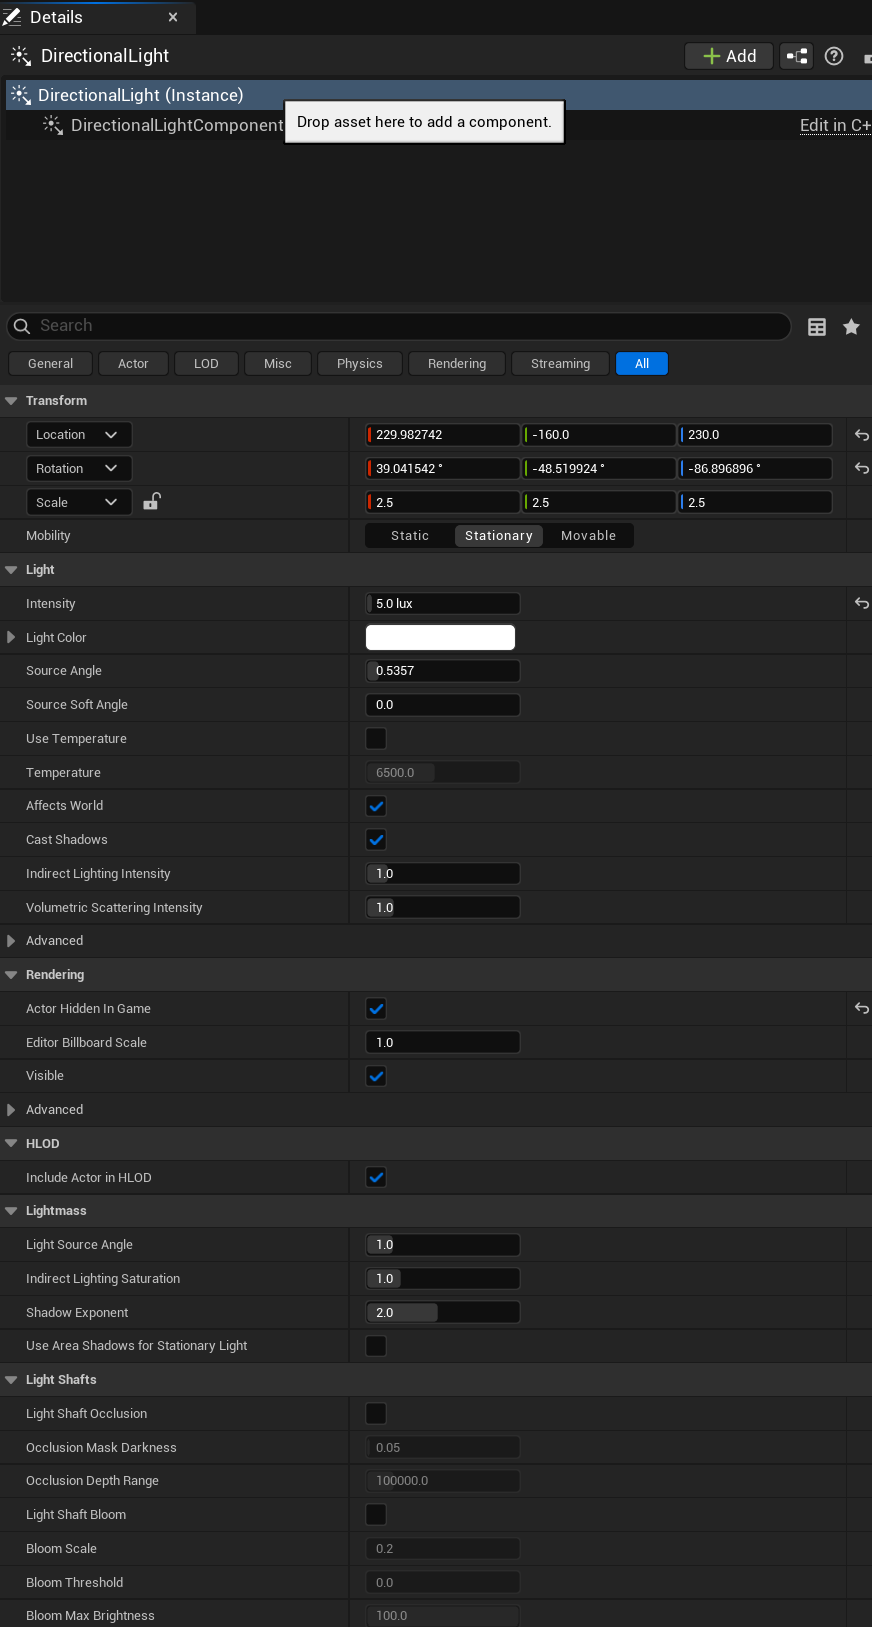
The Directional Light has completely different Details parameters than a Static Mesh Actor. The most commonly adjusted one is Intensity. During the build process for a DMX project, intensity is typically set around 1. During a simulated show, it is often dropped to around 0.1 to let the fixture lighting read properly. Keep in mind that the default map also includes a Post Process Volume, which further affects how light brightness is perceived.
A Post Process Volume is like a camera filter wrapped around your scene. Think of it the way a lighting designer thinks about how a video director would call for all cameras to be set to a certain exposure, lens accessory, or LUT — it does not change any individual light source, but it affects how bright or dark everything looks overall from the camera's perspective. It controls things like exposure, color grading, bloom, and contrast. In stage visualization, it is most commonly adjusted to make sure the ambient brightness of the scene does not wash out or underexpose your fixture output.
Viewport — Top Right Controls
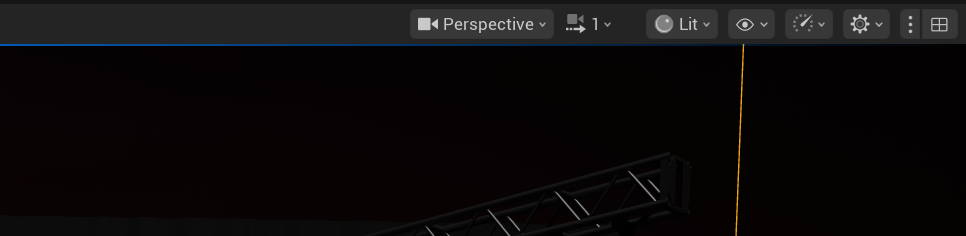
The top-right area of your viewport has a lot going on. Here is a breakdown of the parts most relevant to stage lighting work.
Perspective — clicking this opens additional view modes. Top, Left, Bottom, and Right views are orthographic, meaning there is no depth perception. These are useful for selecting groups of objects by dragging a selection box over them. In an orthographic view, you can also click, hold, and drag the scroll wheel to pull out a quick measuring tape that displays distances in centimeters.
Field of View — zooms the viewport camera in or out. Be mindful of what value it is set to, as altering it can disorient your camera movement.
Near View Plane (default: 10) — any part of an object closer than this value in centimeters to your camera will disappear. Lowering it lets you get closer to objects without geometry clipping out.
Exposure — controls how bright everything registers to the viewport camera. Useful for adjusting your view without touching the actual lighting in the scene.
High Resolution Screenshot — one of the most useful tools in this context. Getting a proper rendering out of Unreal with live DMX control is difficult, so High Resolution Screenshot is a practical solution for client renderings once your fixtures are positioned and programmed.
Lighting View Modes
The Lit dropdown in the top-left of the viewport controls how the scene is displayed. Here are the modes used most often in stage lighting work:
- Unlit — disables all lighting and displays every object as if light does not exist. Great for placing and arranging objects without having to work around bright or dark areas in the scene.
- Optimization Viewmodes > Shader Complexity — turns the entire scene into a heat map based on how computationally expensive each material is. Green is fast and efficient; white means the material is heavy and could benefit from optimization.
Copying Transform Values
Right-clicking in the space between a Location, Rotation, or Scale label and its numeric fields gives you the option to copy that entire vector (X, Y, Z) and paste it into the same property on another object.
You can also right-click to the right of the Transform header itself to copy all three properties at once — Location, Rotation, and Scale — and paste the entire Transform onto another object.
Place Actors
There will eventually be a time when you need to place a basic actor into your level. To open that panel, navigate to Window > Place Actors.
The most commonly used categories are Shapes and Lights.
Drag any object from the panel directly into your viewport to place it in the level. It is surprising what you can build with basic primitives — a stage can be a simple box, a pipe can be a cylinder, an entire stage wash can be faked with a long Rectangle light, and strip fixtures can be nothing more than a scaled cube with an emissive material applied. We will get into materials later.
Outliner Organization
The Outliner has a few useful organizational tools worth knowing.
Folders
You can create a folder in the Outliner by right-clicking any blank area and selecting Create New Folder, or by clicking the small folder icon to the right of the Outliner search bar. Drag actors into folders to keep your scene organized as it grows.
Parenting
You can parent one object to another by dragging it over another object in the Outliner. The dragged object becomes the child of the object it was dropped onto. Any transformation applied to the parent — movement, rotation, scale — is also applied to the child. However, transforming the child does not affect the parent.
Replace Selected Actor With
This tool lets you swap one actor in your level for another, while preserving the original Transform exactly. Here is a quick experiment to see how it works:
- Place any shape in the world — a cube works fine.
- In the Content Browser, navigate to Engine > Content > BasicShapes and single-click the Cylinder to select it.
- Back in the Outliner, right-click the cube you placed and go to Replace Selected Actor With. Next to Selected you will see Cylinder listed — click it.
Your cube is now a cylinder, sitting in the exact same position, rotation, and scale.
In DMX pre-visualization, this is particularly useful for replacing a stand-in object or an existing fixture with a new DMX Blueprint in the same position — no manual Transform entry required.
The Output Log
The Output Log should appear as a tab near your Content Browser. If it is not visible, go to Window > Output Log. It gives you a text-based readout of what is happening under the hood in Unreal Engine. Any errors or warnings will surface here first, so it is a good habit to keep it visible.
If you run into a problem, copying and pasting the Output Log contents into an AI assistant like ChatGPT or Claude can be very useful for diagnosing the issue quickly.
Click inside the Output Log and press Clear Log to start fresh at any time.

Creating Your Own Level
Now let's actually build something. Right-click on any blank area inside the Content Browser — make sure your directory is set to Content, not Engine Content. This opens a menu that can generate a wide variety of assets in Unreal Engine. The one we want here is Level. Click it, and a new level asset will appear in your Content Browser.
Before entering it, press Save All to save the new asset. Then double-click the level to open it.
Do you see anything?
No — because there is nothing there. Check your Outliner to confirm it: completely empty. Think of it as being in deep space with nothing present. No light source, no atmosphere, no objects to receive light even if a source existed.
Fortunately, there is a menu that makes populating these essentials straightforward. Navigate to Window > Env. Light Mixer. Work through each item slowly and observe what each one does.
Directional Light
Create a Directional Light first. This is the equivalent of adding a sun to your empty space. Nothing looks different yet though — the sun is there, but there is nothing for it to shine on.
Sky Atmosphere
Now create a Sky Atmosphere. This is the equivalent of adding an atmosphere and arriving on Earth. If you pause here and drag a shape into your scene, you will notice one side is very bright and the other is unnaturally dark — almost like the light has a single source but nothing is bouncing it around to fill in the shadows. That is exactly what is happening.
Sky Light
The Sky Light solves this. It reads what the Sky Atmosphere is capturing and reflects that light inward, simulating the way scattered sky light illuminates objects from all directions — not just from the sun angle. Delete the Sky Atmosphere temporarily and you will immediately see what the Sky Light was contributing.
Exponential Height Fog
The Height Fog adds a ground-level atmosphere effect. It subtly obscures objects near the ground and thins out as elevation increases, simulating the way real atmospheric haze behaves. It is a powerful but understated tool when aiming for realism — though it sees little use in DMX pre-visualization work.
Volumetric Clouds
The final item in the Env. Light Mixer is Volumetric Clouds. It generates realistic, puffy clouds in the sky. Rarely used in DMX pre-vis, but nice to know it exists.
Project Settings
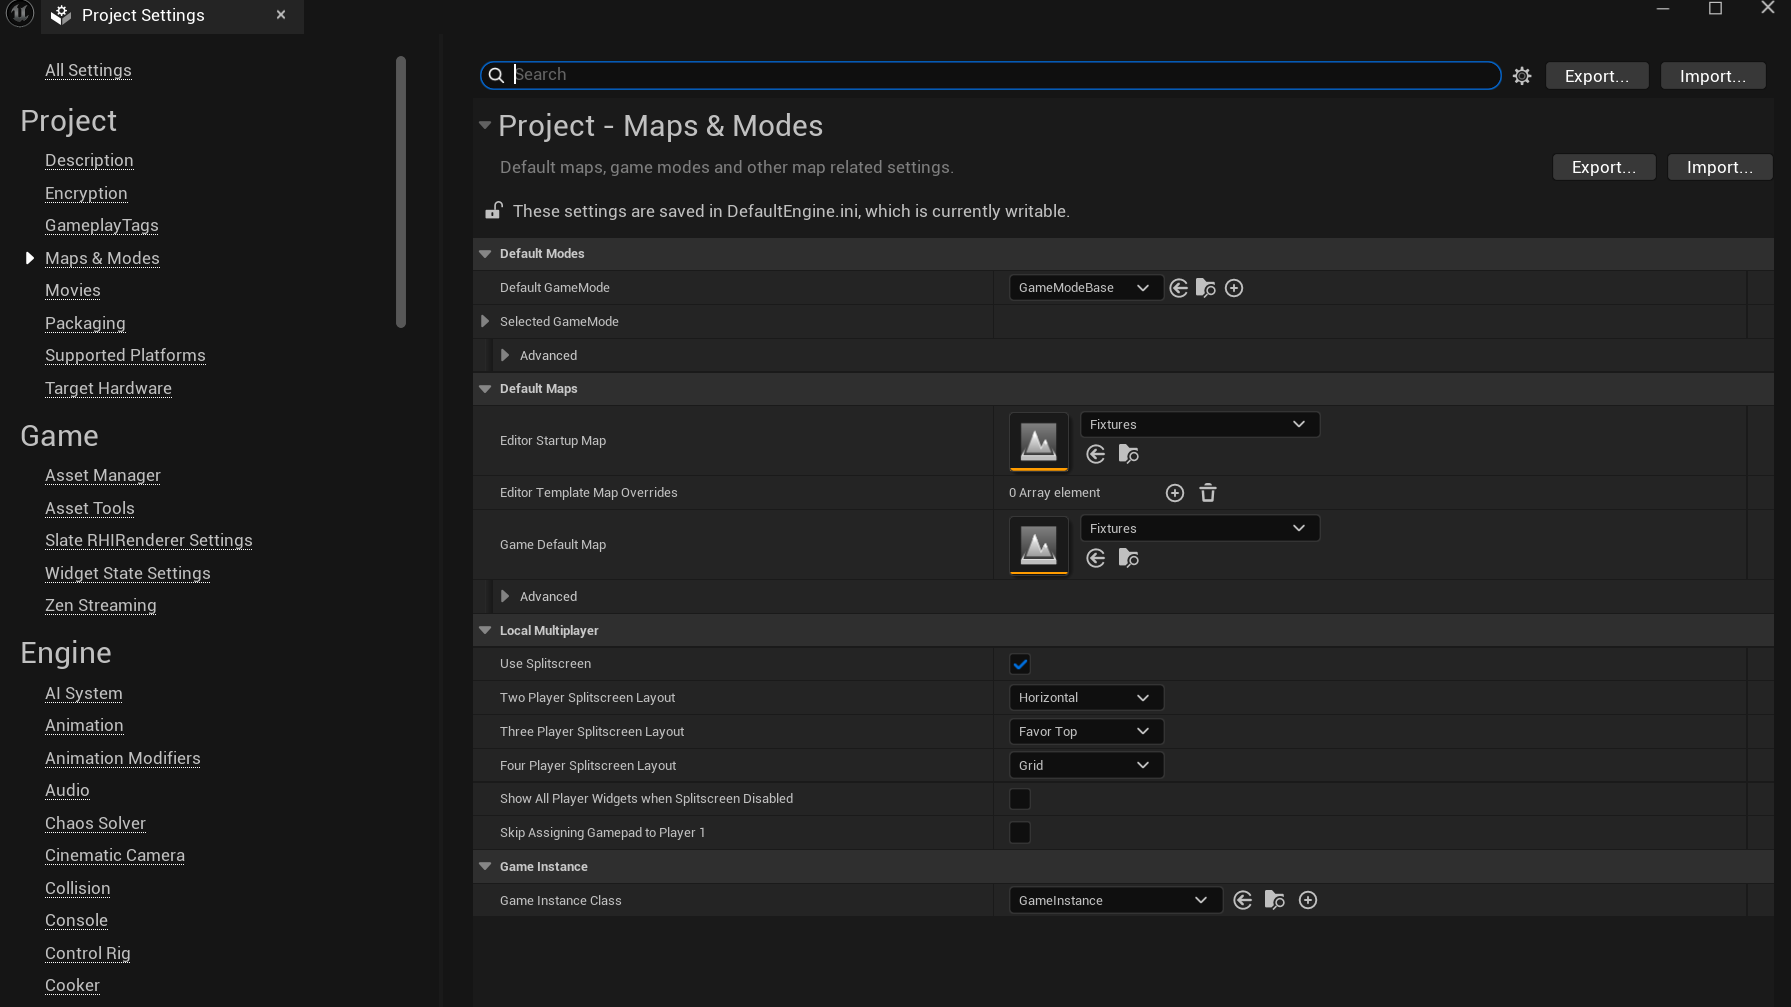
Navigate to Edit > Project Settings. This window exposes a wide range of options for your project and any plugins you have enabled. One of the most immediately useful settings is the ability to define which level loads automatically when the project opens.
Find Editor Startup Map and click the dropdown — if you are in the DMX Template project, it should currently show Fixtures. You can switch this to your new level here.
A note of caution: this setting is convenient but carries some risk. If you set your Editor Startup Map to an experimental level that crashes Unreal Engine on load, you will have a difficult time changing it back — the editor crashes before you can reach Project Settings.
If that happens, the most reliable workaround is to navigate to your project's Config folder on disk and open DefaultEditorPerProjectUserSettings.ini (or DefaultEngine.ini depending on the UE version). Search for EditorStartupMap and either delete the line or point it back to a stable level. This bypasses the editor entirely and lets you correct the setting before launching again. If you have source control, reverting the config file to a previous commit achieves the same result.
The search bar at the top of Project Settings is also worth knowing about — if you are looking for a specific option and do not know where it lives, searching a keyword will usually surface it quickly.
Plugins
Navigate to Edit > Plugins. This window lets you enable or disable any plugin that ships with the engine, as well as any third-party plugins you have added manually. Third-party plugins are added by placing them in a folder named Plugins in the root directory of your project — this is how the 1M Lights fixture pack plugin is installed. After enabling or disabling any plugin, Unreal Engine will require a restart to apply the change.
That's a Wrap
That's all for this tutorial — but if you found it helpful, here are a few ways you can support me and help keep this content going.
YouTube
youtube.com/calebhoernschemeyer — Subscribe and see what other tutorials are available. A subscription and even one additional video view goes a long way for visibility, and helps me work toward monetization so I can accelerate tutorial output.
Patreon
patreon.com/calebhoernschemeyer — If this tutorial was useful to your career, consider a contributor subscription. Just $5 a month helps me commit more time to tutorials, advice, and community projects like this one. To be clear — a subscription is simply a way of saying thank you, not a requirement to get my time. I will be available to chat regardless of Patreon status. If you couldn't tell from the work put into this, I genuinely love teaching.
Discord
discord.gg/HKZb2yJse3 — Join a community of people using Unreal Engine for DMX control. Chat with me, other users, ask questions, or show off your work.
Thank you for using this tutorial!